
TimeLapse & Hyperlapse Post Productions Tutorial
So, after you shot your beautiful TimeLapse or Hyperlapse, you got 250-ish Raw files and you may have no clue how to process them! No worries, I'm here to help! :)
In this blog tutorial, I will take you through the post-production of a TimeLapse and Hyperlapse, from the Import to the final video.
SOFTWARE YOU NEED
THE FREE VERSION
For Mac: Timelapse Assembler - http://www.dayofthenewdan.com/projects/time-lapse-assembler-1
For Windows: Visual Dub - http://www.virtualdub.org/download.html
To get the best tutorials on how to use this software, visit the Syrp YouTube Channel they've done a great job explaining how to use it.
THE PAID VERSION
This is where it gets interesting, my workflow for editing Timelapse and Hyperlapse consists of three main software, Adobe Lightroom, LRTimelapse and Adobe After Effects.
These three pieces of software working together is the best way to create a top-quality Timelapse, without losing any details from the initial raw file.
I will now go through my workflow step by step.
1. I create a new project folder on my HardDisk to import the Raw images from the SD card, I usually go like this: Year -> Month_Year -> Day_Month_location -> Day_Month_Location_TL -> Day_Month_Location_TL_Raw,

2. Once I downloaded the Raw into the folder, I open Adobe Lightroom and I import the folder I just created, here I do the colour correction, Contrast/Highlight/Shadows etc.
Now, there are two paths from here:
If I made a Timelapse during the day or night that doesn't require any de-flickering or smooth transitions between different White Balance, Highlights etc. I will just edit the first raw and sync my settings to all the other images in that folder, then save the metadata. (The Metadata is the file that LR creates beside your original file with all the changes you made).
If I make a Timelapse where I change exposure settings, a sunset or a sunrise, for instance, I will need to use LRTimelapse that allows me to correct those changes and make a smooth transition between different settings.
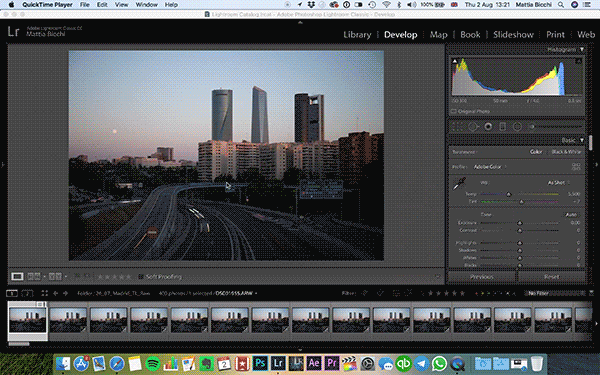
3. Now, that I saved all the metadata to my photos, it's time to open Adobe After Effects and create a new project the first thing I do, is adding the raw file sequence, (remember to rename your raw files in a progressive name) and create a composition.
4. From the composition, I set the resolution that I want to export the video, which normally would be 4K, so 3840x2160, scale down the images and add the composition to the render queue.

5. If I shot an Hyperlapse I select Warp-Stabilizer from the Effects tab and apply it to the footage, I normally leave the setting as default, if it isn't perfect I would select in advance setting, Detailed Analysis and change the Rolling Shutter Ripple's option from Automatic Reduction to Enhanced Reduction, sometimes it stabilises a bit better on some sequence.
6. To export the video, the settings I use to get the best quality are Quicktime, ProRes 422 (HQ), and 16bit, then I select the folder where I want my clip to end up and Render!
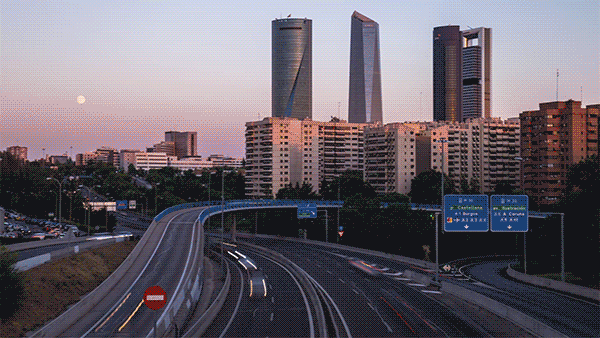
That's it! Now I have my Timelapse ready to be edited on a short film and uploaded on Social Media or Stock.
I really hope this tutorial will help you to start or create more Timelapse
Of course, if you have any questions regarding this tutorial, feel free to ask me by leaving a comment below or through my social media.
Don't forget to say hi on my Instagram Account and subscribe to my YouTube channel!
I'll see you in the next post!
Thanks for reading!